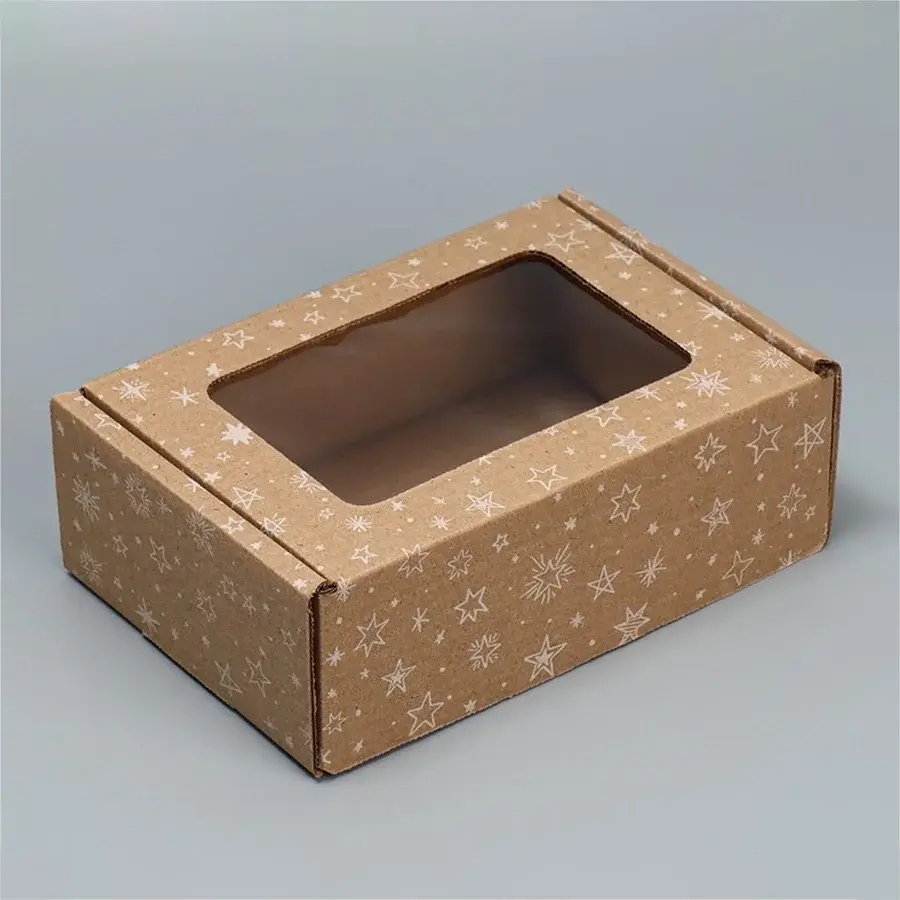

A plain rectangular box does the job for a book or a bag of coffee. Put a bottle of serum, a pair of earbuds and a thank-you card in the same box, though, and you start wishing it had a bit more thought behind it. That’s the gap die cut packaging fills. Instead of folding a standard shape around your product, the box gets cut to suit it, with windows, tabs, slots and locks exactly where they’re needed. It’s a small change, and it makes a surprisingly big difference the moment a parcel gets opened.
So what are custom die cut cardboard boxes, exactly? A die is basically a cookie cutter for board: a wooden base with sharp steel blades set into it, shaped to your design. Press a sheet of cardboard against it and out comes a flat piece with every cut, crease and cutout already in place. Fold it up and you have a box that fits your product, not one that happens to be close. The rest of this guide covers how it works, which styles are worth a look, and what to check before you place an order.
How it actually works
Most boxes are made on a flatbed die cutting press. The die sits on one side, the board on the other, and the machine squeezes them together. Cutting blades slice through the board, while blunter creasing rules press the fold lines in. Rotary die cutting does the same job on a drum and suits very large runs, though for typical packaging orders flatbed is far more common. Either way there’s a one-off tooling cost to make the steel rule die, and the same die can be reused for repeat orders.
That tooling cost is why quantity matters. Spread across 100 boxes it can look steep. Spread across 5,000 it barely registers. It’s also why you should lock your dimensions before the die is made, because changing a blade later means paying for another one. Ask your supplier for the die line template early. It’s the flat outline showing every cut and fold, and it’s what your designer builds the artwork on top of.
Styles worth knowing
Mailer boxes are the most popular die cut style for online sellers, because they lock closed without tape and open like a little book. Tuck-end boxes suit lighter retail products such as cosmetics or supplements. Sleeve-style packs slide over a tray, which is handy for gift sets. And if you sell something odd-shaped, a fully custom outline might beat any standard layout. I’d always compare two or three layouts on a flat sample before committing.
Cutouts are where die cutting gets fun. A die cut window lets the buyer see the product, a finger notch makes a tray easy to lift, and a hang tab lets a pack sit on a retail hook. Be careful with windows, though. The more board you remove, the weaker the box gets, and a big window on the wrong panel can make it sag in the post. Plastic film across the opening can also complicate recycling, so ask what the film is made of.
Board and material
Thickness first. E-flute corrugated is thin and prints nicely, which is why it’s common for mailers. B-flute is thicker and tougher, better for heavy items or boxes that get stacked. Lighter products on a shop shelf can use folded paperboard, which is flatter and prints sharper still but gives less protection. If you’re unsure, think about the route the box will travel and be honest about how rough it is.
Kraft paper gives a natural, slightly rough look, while white-coated board suits bright colour. Both can be recyclable, but only if the finishes stay simple. Heavy lamination, glitter and mixed-material windows all make recycling harder. If sustainability matters to your customers, ask your supplier which finishes keep the box kerbside-recyclable. Don’t just assume.
Inserts
A lot of damage happens inside the box, not to it. Products slide, knock together and arrive scuffed even when the outer carton looks perfect. That’s where die cut box inserts earn their keep. A cut-to-fit tray or divider holds each item in its own slot so nothing moves, and it makes the opening moment feel considered. Inserts can be corrugated cardboard, folded paperboard, moulded pulp or foam, depending on the weight and how fragile the product is. Good product protection often costs less than the refund it prevents.
Measure the product itself, then add a small allowance so it drops in without a fight. Too tight and customers struggle to get it out. Too loose and it rattles. A snug fit is the goal. Leave a finger gap so people can lift things without tearing the card. Then test it: put the product in a sample, close the lid, shake the box and tip it upside down. If anything moves, change the insert before you order the full run. Cheap fix at this stage. Expensive later.
Print and finish
Print goes on before the cutting, so your artwork has to extend past the cut lines. That overhang is called bleed, and without it you’ll get thin white edges wherever the blade lands slightly off. Keep logos and important text away from folds and cutouts as well. Pantone colour matching keeps brand colours consistent from one order to the next, while foil stamping, spot UV and matte lamination add a more premium touch. Just remember that heavy finishes across a crease can crack when the box is folded.
Everyone wants the best die cut boxes, but best is relative. For a skincare brand it might mean a sturdy mailer with a neat insert. For a bakery it might mean a window box that keeps the product clean. The common thread is simple: it fits the product, folds without a fight, closes securely and survives the courier. Clean cuts and crisp creases matter too. Fuzzy edges or cracked folds are the first things customers notice, and they say more about your brand than you’d think.
Ordering without regrets
Always ask for a mockup before you order. A flat 2D proof checks the artwork, a 3D render shows the shape, and a physical sample lets you test the fit, feel the board and see how the lid closes. Good suppliers offer at least some of these for free. Send them your product dimensions, weight, the number of items per box and how the parcel will be shipped. The more they know, the better the first sample will be.
Budget properly. Your cost per box depends on size, board, print and finish, plus that one-off tooling charge. Ask for quotes at two or three quantities, because price breaks often show up sooner than you’d expect. Boxes arrive flat-packed, so storage is easy, but you still need shelf space and a plan for who assembles them. Assembly time adds up quicker than most people think, especially with intricate designs.
If you’re planning regular repeat orders, die cut boxes wholesale is usually where the maths starts working in your favour. The die is already paid for, setup is faster, and unit prices fall as quantity rises. Plan reorders around actual sales, though. Over-ordering ties up cash and floor space, and designs change. Plenty of sellers order a smaller first batch, see how customers respond, then scale up with a refined layout.
Also Read